
Hello. Welcome to atom Geospatial Solutions. Thanks for spending your time to always read our content. Your contribution in reading our posts has always motivated us to write more.
Kindly like our Facebook page @ atomgeospatialsolutions to join our audience and never to miss out on nice literature.
Today we'll demonstrate how to split a raster image in QGIS.
Well many of you colud be asking yourselves why i always use QGIS.
it is because it is free, easy to use and learn.
 |
| Tiled Raster |
What is a raster Image:
A raster is a representation of a geographical phenomena in pixel format.
Many times raster are big in size and you may want to extract how particular cubes to use in your project work. here is how you can .
In this tutorial ill use a raster from the Massachusetts buildings Data set. Thanks to Dr.Volodymyr Mnih Mnih for we can access this data set
Step 1: Open Qgis and add the raster Layer

Step 2: Right click on the layer, export, save feature as:

Step 3: Tick the vrt option, once you tick it a new option will be addedwhere you can specify the height and width of the tiles. I suggest that you leave the other values as defaults
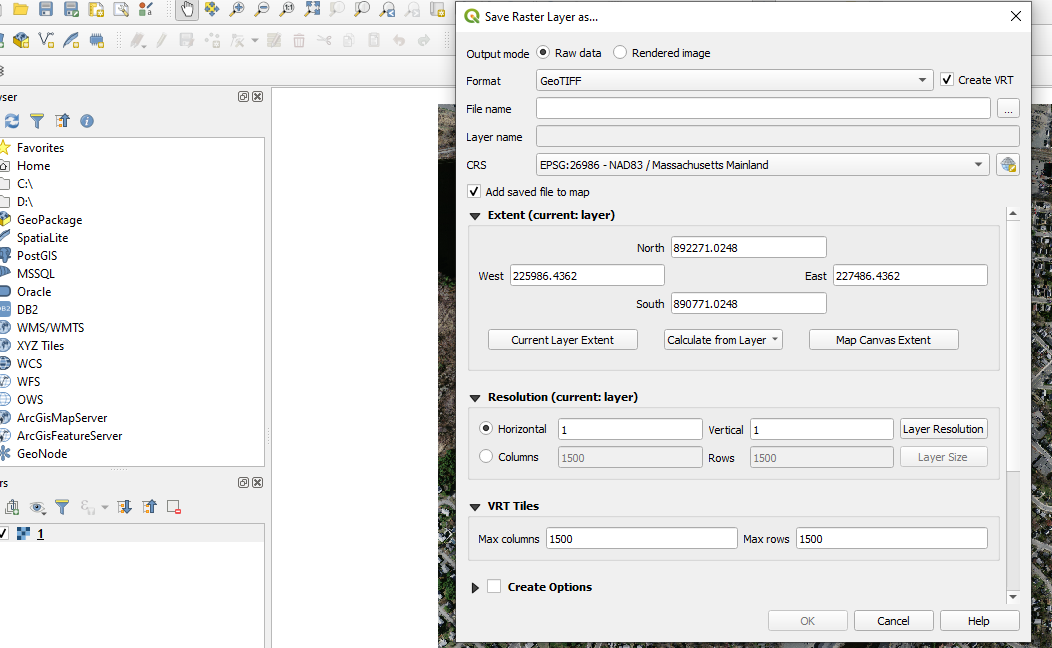
Step 4: Save your output to a destination folder. Once the execution is done , your can import any tiles you want to use in your analysis.

End of tutorial.

![QGIS Georeferencing [Tutorial]](https://blogger.googleusercontent.com/img/b/R29vZ2xl/AVvXsEjc9sq2qo8xv4uKC-9P4l8_T0Xr6L7HS2yf2jjcZigHKve-J-c4aFb6U2h1ujYPZkIlZc1ejAuK_1Wk3MmQBQSzDmPIy1v4BhN0HgJ8S0n3U9PMZtm7PRE-eO1adeR_Qa25ghApjRgfZvw/w72-h72-p-k-no-nu/uganda_se_1964.jpg)
