
They are representations of heights. Always on engineering projects, surveyors,engineers are required to produce contours maps .

These maps are used to do planning, architectural designs, curve ranging e.t.c.
However the production of contours involves a lot of work starting from field work and data collection, pre-processing and lastly software work.
In practice, many surveyors use AutoCad software to draft the countours.
In this guide am going to teach you how to easily produce contours in a few clicks using Qgis.
Before diving into the guide, kindly follow us on facebook to always recieve updates at atom geospatial solutions or use the like button below.
In this tutorial we assume that, the reader can clean, pre-process
the field data collected into an excel work book in csv format.
Step 1: Import the excel csv data set into Qgis and specify the X, Y, Z fields and the coordinate system

Step 2: Load the data into the software. Right click on the layer and export it as a shape file.

Step 3: Open the plugin tool, open it, download and install Qgis contour plugin.

Step 4: Open the installed plugin (contour plugin)

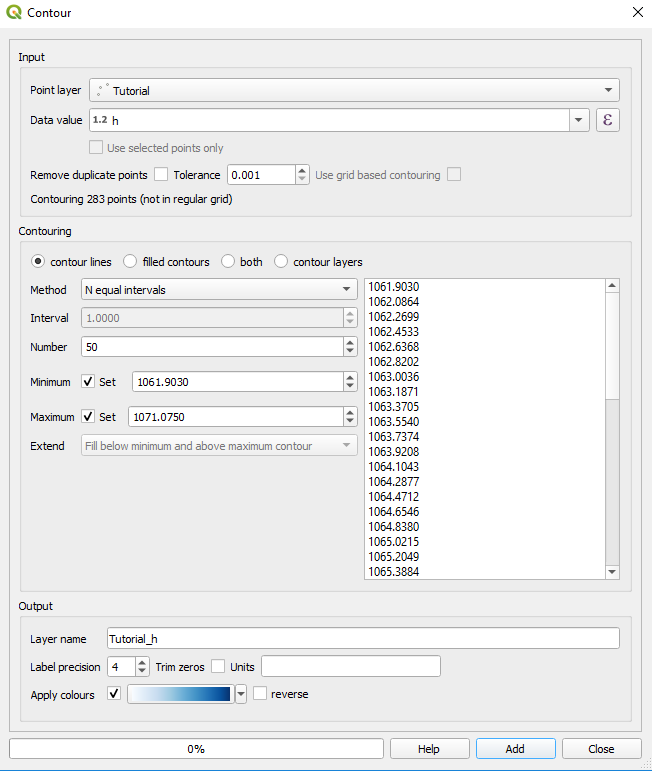
Step 5: Customize the contour output you like the tool to output
Step 6: Visualize your output.

Proceed to style and label the contours the way you want


